HTML Tutorial - Lesson Two
Simple Ways to Change Text
This tutorial assumes that you have already gone through Lesson One.
- If your computer isn't already on, turn it on.
- Once the computer has completely booted up open Notepad. Click Start -> Programs -> Accessories -> Notepad
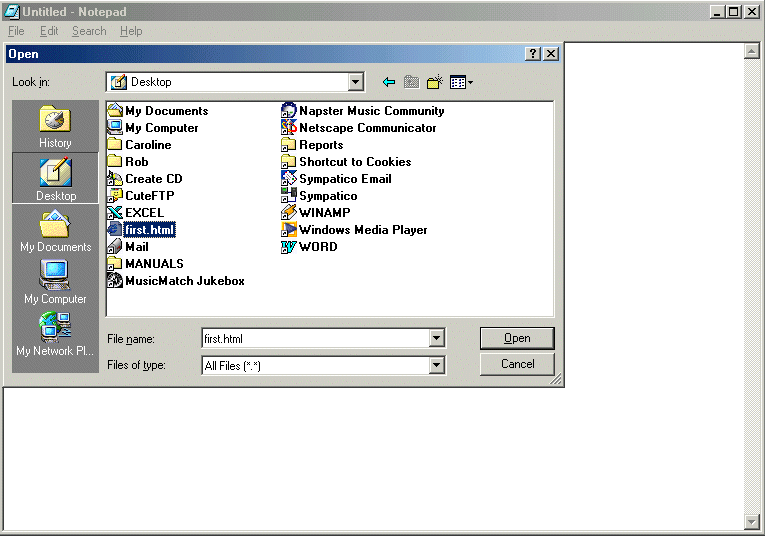
- Open the file you made in the last lesson. File -> Open, navigate to the desktop, make sure that Files of type is set to All Files, select first.html and click the Open button. Confused? See the screenshot.
- Where you currently have my first change the text to yourname's second. (Substitute your actual name for yourname).
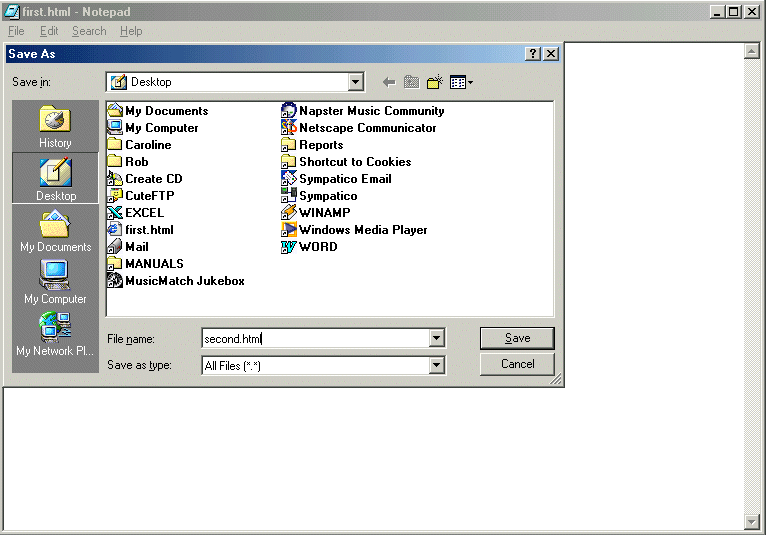
- Save the document with the name second.html. File -> Save As..., change the file name to second.html, make sure Files of type is set to All Files and that the file is being saved to the desktop. Click the Save button. Confused? See the screenshot.
- Minimize Notepad
- Double-click on second.html on the desktop. Your browser (Internet Explorer or Netscape Navigator) should open up your document. It should look like this.
- But wait! There's more! We've changed what the actual words are, but now let's change how they look. Minimize your browser and go back to Notepad. Surround second with <i> and </i>. Your source document should now look like this:
<blockquote><html>
<body>
This is Jennifer's <i>second</i> HTML document.
</body>
</home>
- Save your changes. File -> Save.
- Go back to your browser and click on the Refresh or Reload button. Your page should now look like this.
- You've italicized! Shall we try making some text bold? Go to Notepad and surround HTML document with <b> and </b>. Your source document should now look like this:
<html>
<body>
This is Jennifer's <i>second</i> <b>HTML document</b>.
</body>
</home>
- Save your changes. File -> Save.
- Go back to your browser and click on the Refresh or Reload button. Your page should now look like this. Fabulous isn't it? :)
- Now play around with this and see what you can do. Lesson Three will be posted sometime.